
This guide walks you through how to access, filter, and understand the Lead Routing report in OP, including viewing deal details, lead status, and more.
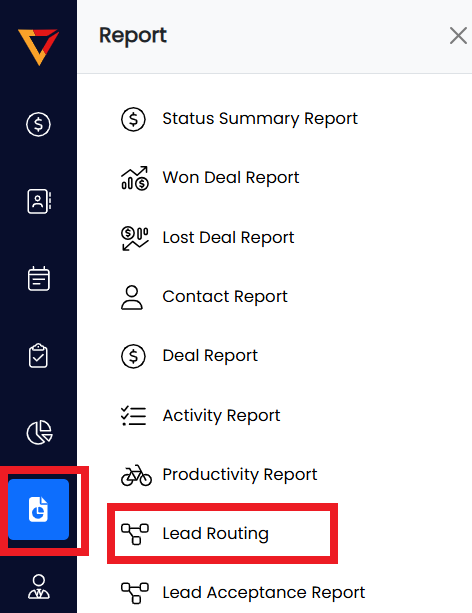
Step 1: Log in and Access Lead Routing Report
- Log into your OP account.
- Click on Report from the left menu.
- From the dropdown, select Lead Routing.

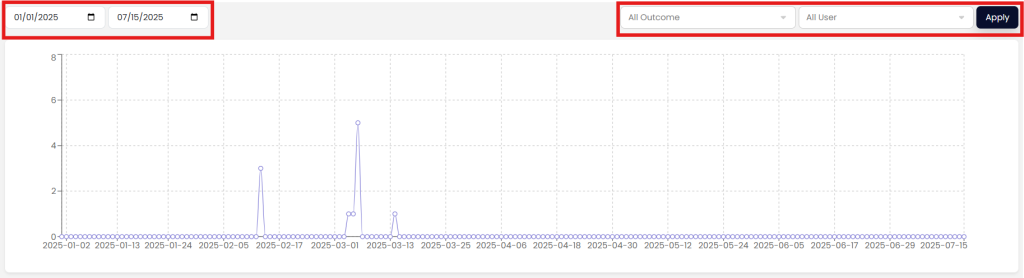
Step 2: Apply Filters
- Top Left: Select the Date filter to choose your desired date range.
- Top Right: Use the Users and Outcome filters to narrow down results by salesperson or lead outcome.
- Click Apply to update the data based on your selected filters.

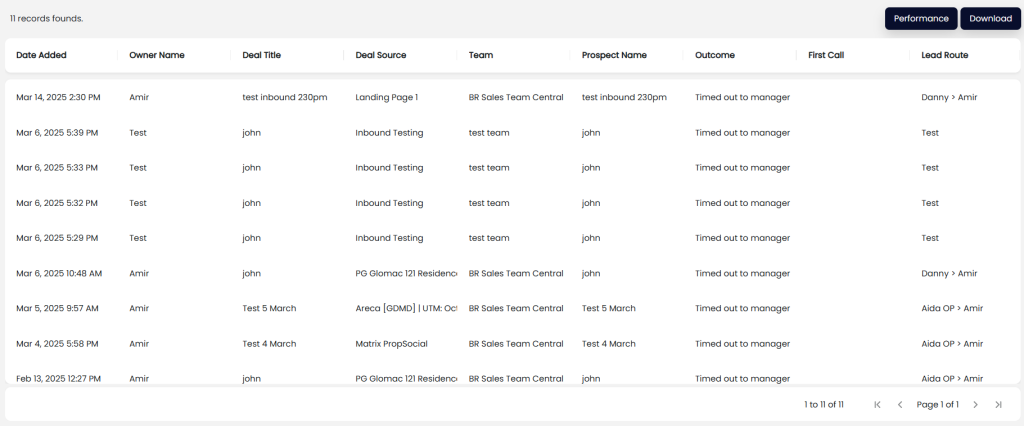
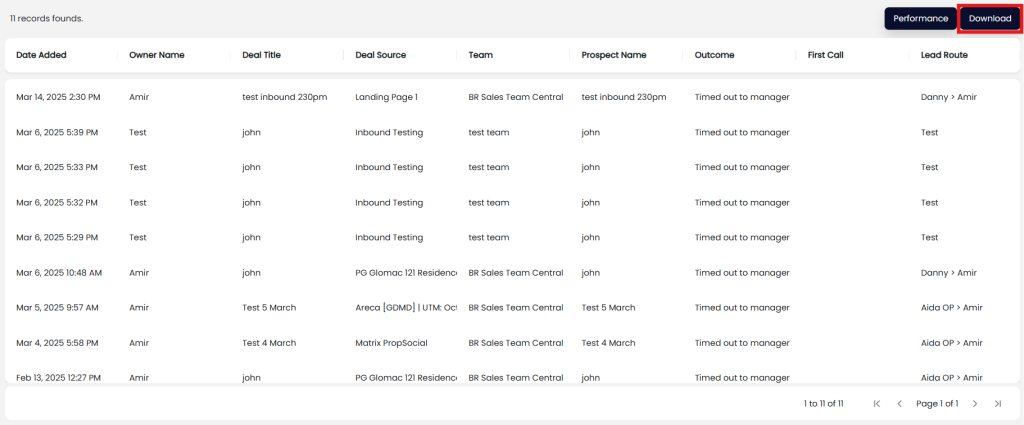
Step 3: View Filtered Report Data
Once filters are applied, scroll to the bottom of the graph to view the relevant lead routing data. Key information includes:
- Date Added – The timestamp when the lead was received.
- Owner Name – The name of the deal owner assigned to the lead.
- Deal Title – Title of the opportunity. Click on it to open full deal details.
- Deal Source – Indicates the campaign or source that generated the lead.
- Team – Displays the name of the distribution team.
- Prospect Name – The lead’s full name.
- Outcome – Two possible statuses:
- Lead Routing – Waiting for sales rep to accept the lead.
- Time Out to Manager – Lead was not attended by any sales rep and escalated to a manager.
- First Call – Link to the recording of the first call made to the lead.
- Lead Route – Displays the routing path of the lead to the assigned rep.

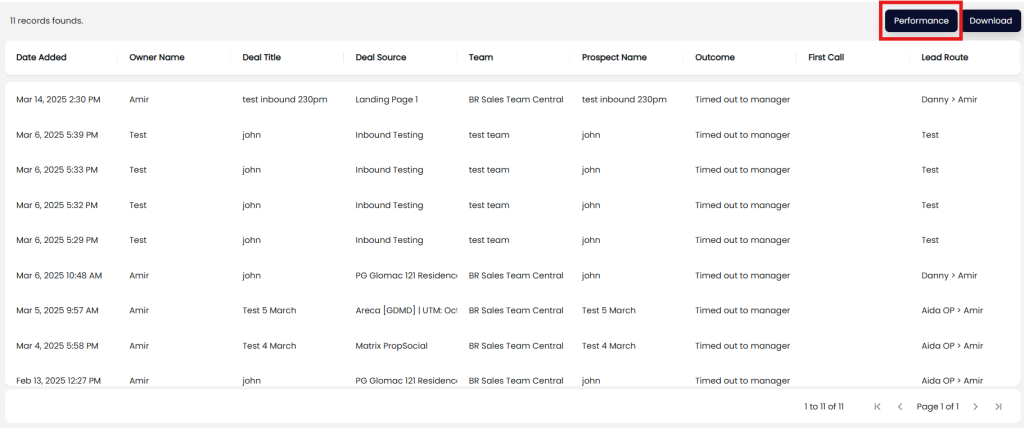
Step 4: View Deal Performance Report
- Click the Performance button at the top or within the report to view detailed Deal Performance analytics.

Step 5: Download the Data
- Click the Download button to export the filtered data into a report file (usually CSV or Excel, based on system config).

Pro Tips
- Use filters strategically to monitor rep performance and lead engagement efficiency.
- Review First Call recordings regularly for quality assurance and training insights.
- If a lead times out to the manager frequently, it may indicate delayed response by reps — investigate the timeline.