Hi, how can we help you?
How to add/create Custom Fields?
This guide shows Admin and Manager users how to create custom fields for deals or people, allowing teams to capture additional data tailored to their workflow.
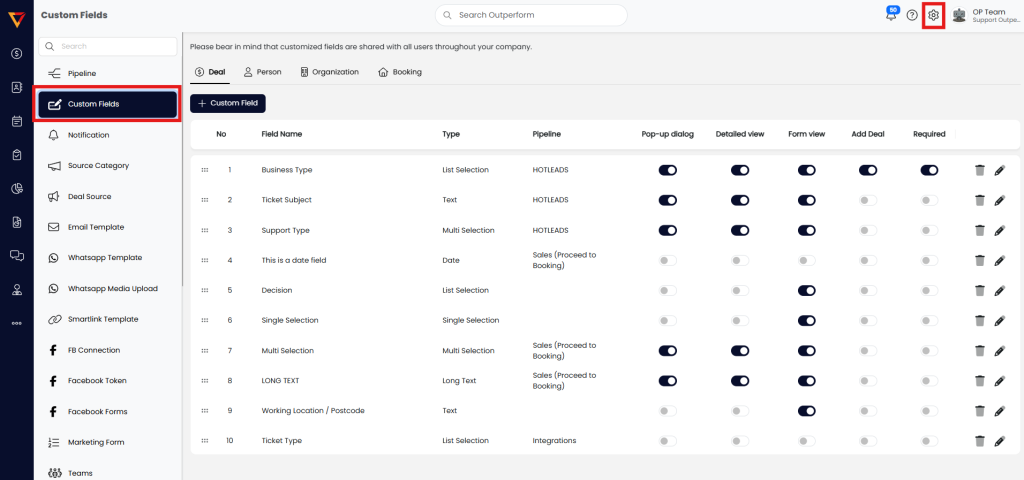
Step 1: Access Custom Fields Settings
- Log into your Outperform account (Web).
- Click on your Settings (top right).
- From the left menu, click on Custom Fields.
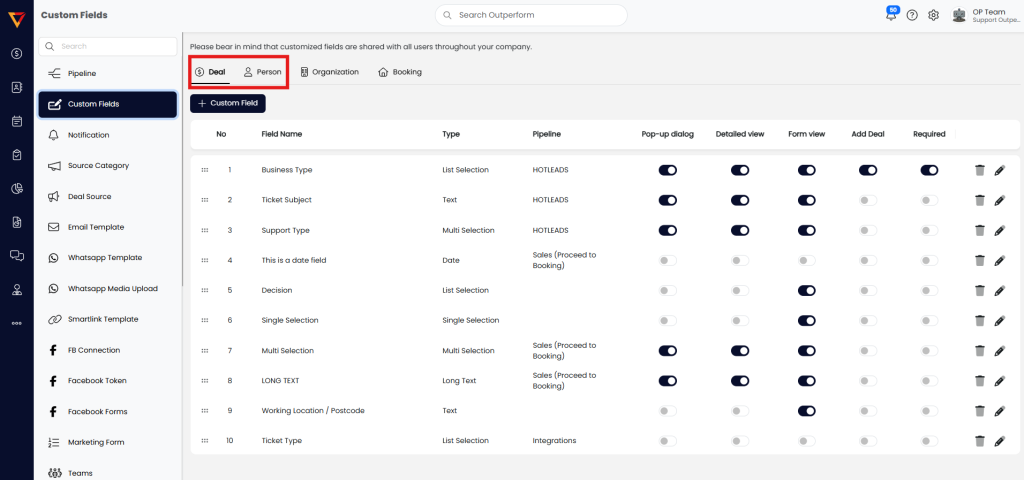
Step 2: Choose Field Type
- Select whether you want to create a custom field for:
- Deal
- People
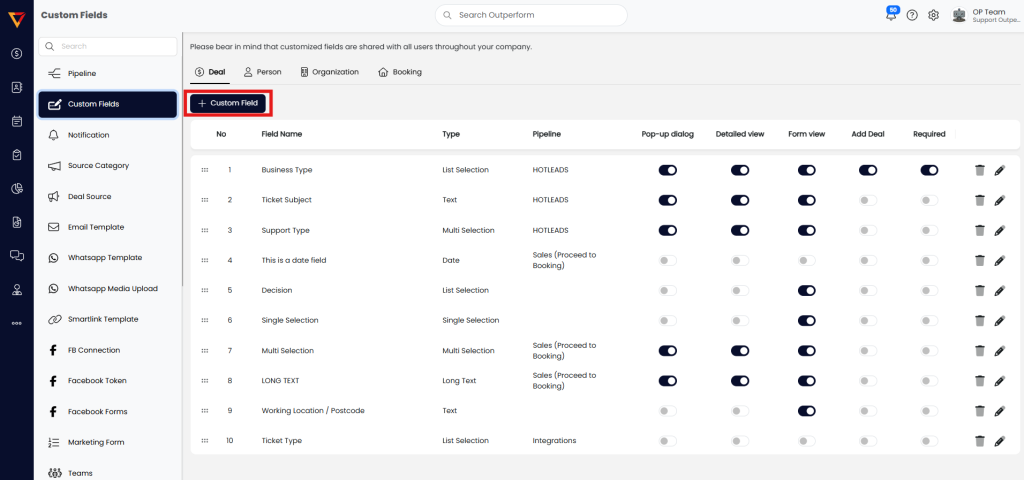
Step 3: Add a New Custom Field
- Click the Add Deal Field (or Add People Field) button.
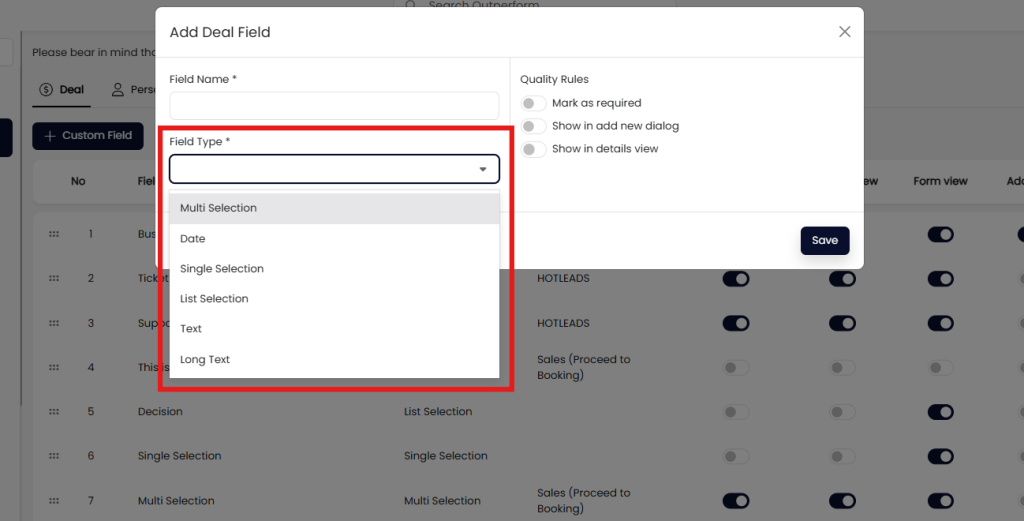
Step 4: Select Field Format
Choose a field type based on how the data should be collected:
- Multi Selection – Choose multiple answers from a list.
- Date – Select a date from the calendar.
- Single Selection – Choose one option from a list.
- List Selection – Select one item from a dropdown menu.
- Text – Enter short free-text answers.
- Long Text – Enter extended text (textbox resizes).
Refer to this link for detailed explanation on Type of Field
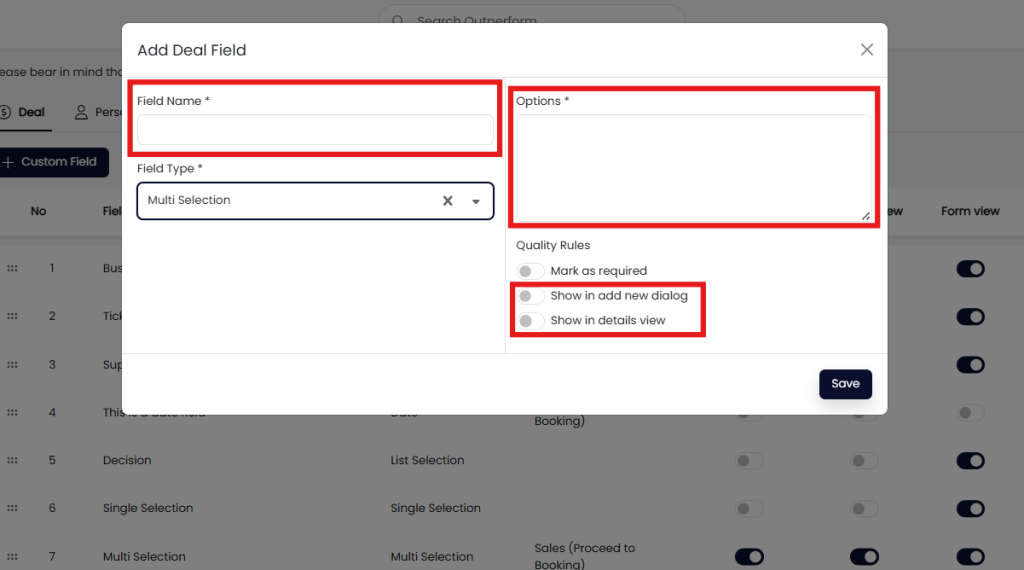
Step 5: Enter Field Details
- Fill in the Field Name.
- Add possible values (for selection-based fields).
- Optional: Choose visibility settings:
- Show in Add New Dialog – Display field during deal/person creation.
- Show in Details View – Display field in the record detail view.
Refer to this link for detailed explanation on “Show in Add New Dialog” and “Show in details view”
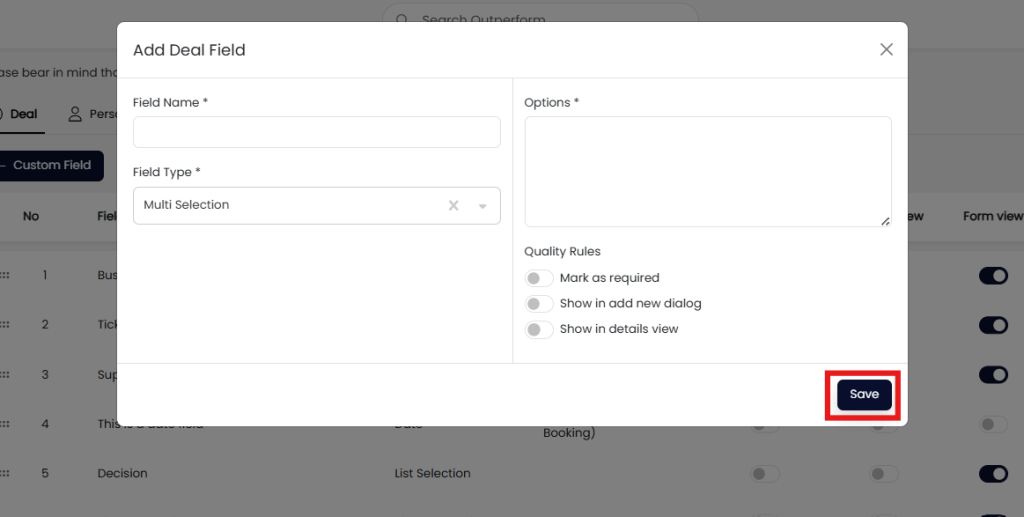
Step 6: Save Your Custom Field
- Click the Save button to finalize.
Step 7: Custome Field Configuration
Enable the relevant options to control where the custom field appears
- Pop-up dialog = Shows the field in the deal detail drawer.
- Detail view = Displays the field in the Detail section of the deal detail page.
- Form view = Includes the field in the marketing form.
- Add deal = Displays the field when creating a new deal.
- Require = Makes the field mandatory to fill in.

Done!
Your custom field has been successfully created and is now ready for use.
✅ Pro Tips
- Use consistent naming for easier reporting.
- Add only necessary custom fields to avoid clutter.
- Test new fields by creating a sample deal/person to confirm display and function.