
This guide walks Admin and Manager users through how to edit or update user information in OP — including name, email, permissions, and team settings.
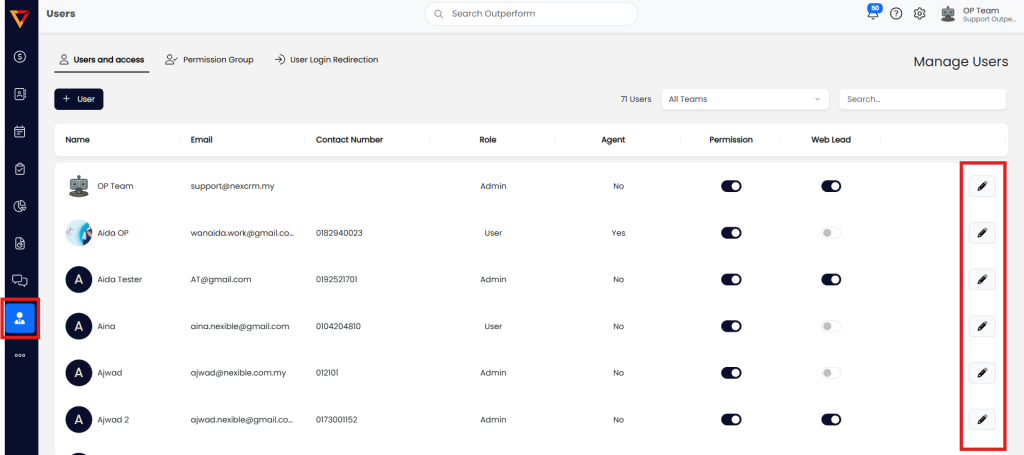
Step 1: Access the User Management Page
- Log in to your Outperform account (Web version).
- Click on the User tab from the left-hand menu.
- Click the pencil icon ✏️ next to the user you wish to edit.

Step 2: Change Profile Photo
- Click the profile image area to upload a new picture.
- Recommended format: JPEG
- Recommended size: 300px × 300px

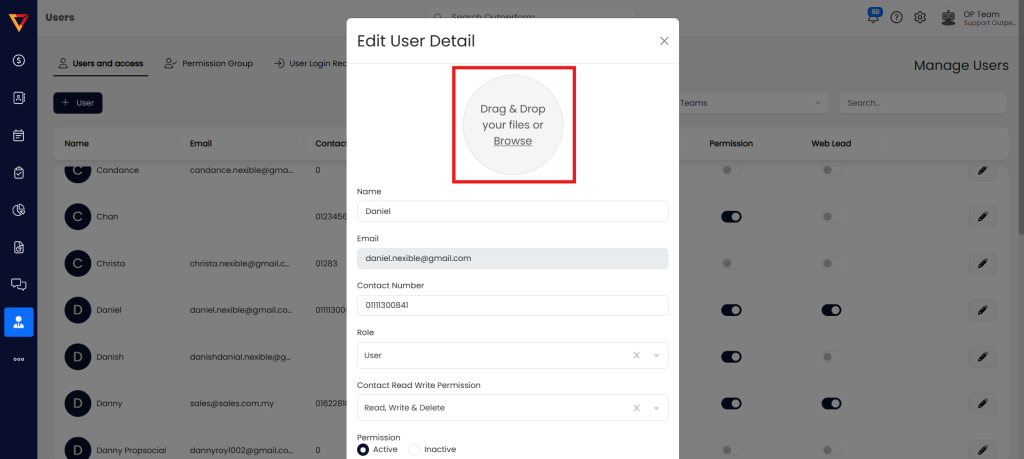
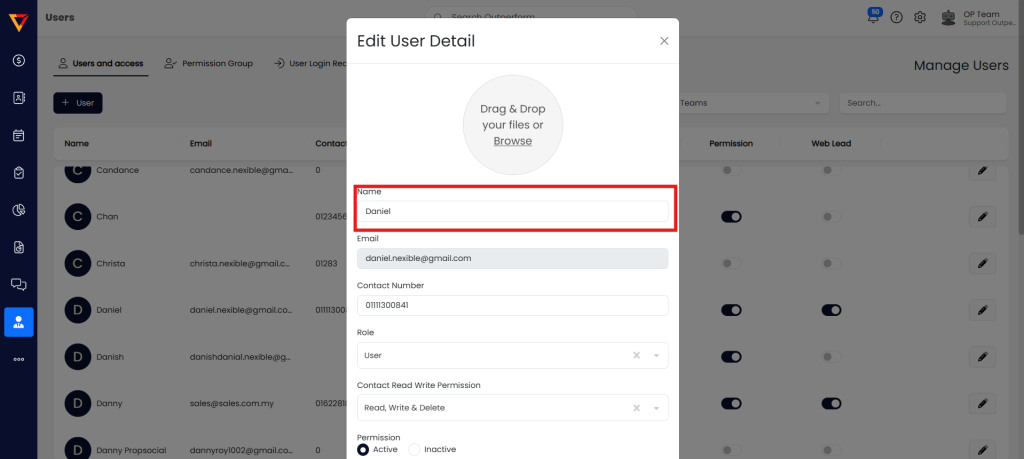
Step 3: Change Name
- Enter the user’s new display name in the name field.
Step 4: Change Email
- Enter a new email address.
⚠️ Note: OP does not allow multiple accounts with the same email address.

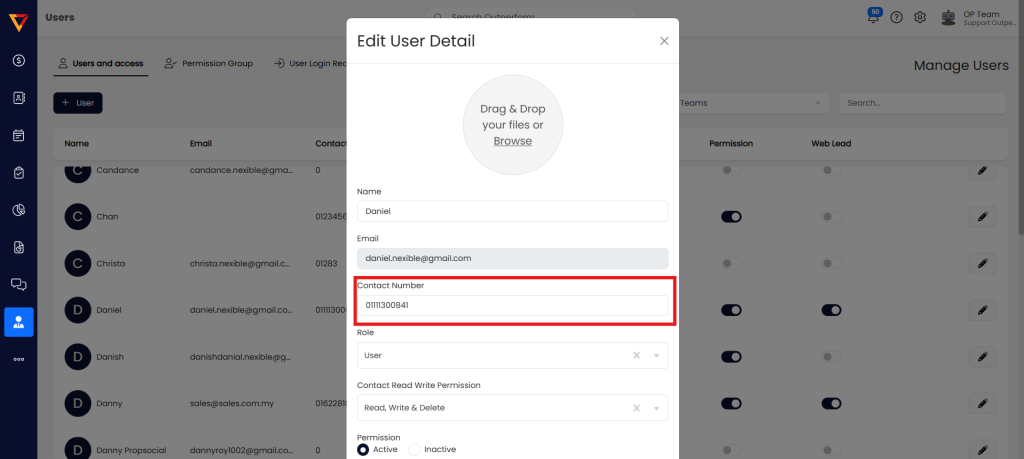
Step 5: Change Contact Number
- Enter the new contact number (without leading “6” and without spaces).
⚠️ Call Tracking users: Please contact Support to update this number.
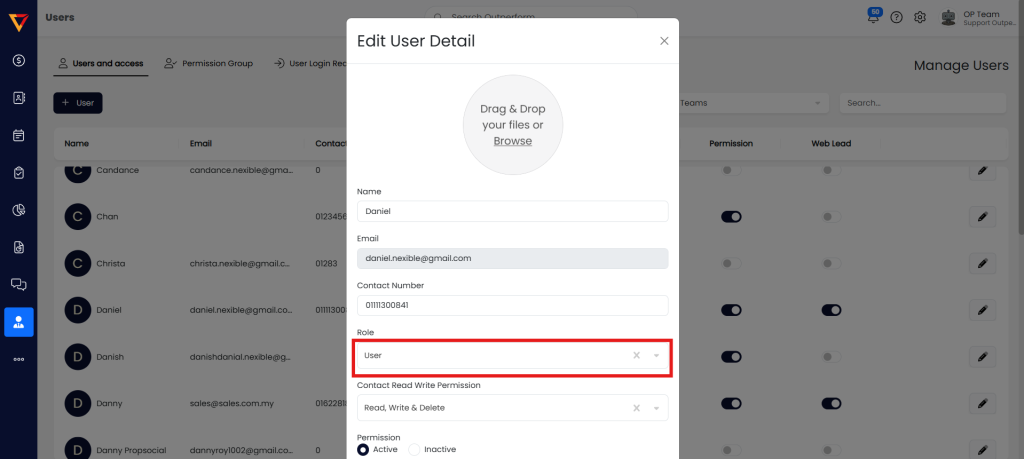
Step 6: Change User Role
- Choose the appropriate role from the dropdown:
- Admin
- Sales Rep
⚠️ To assign the Manager role, please contact OP Support.
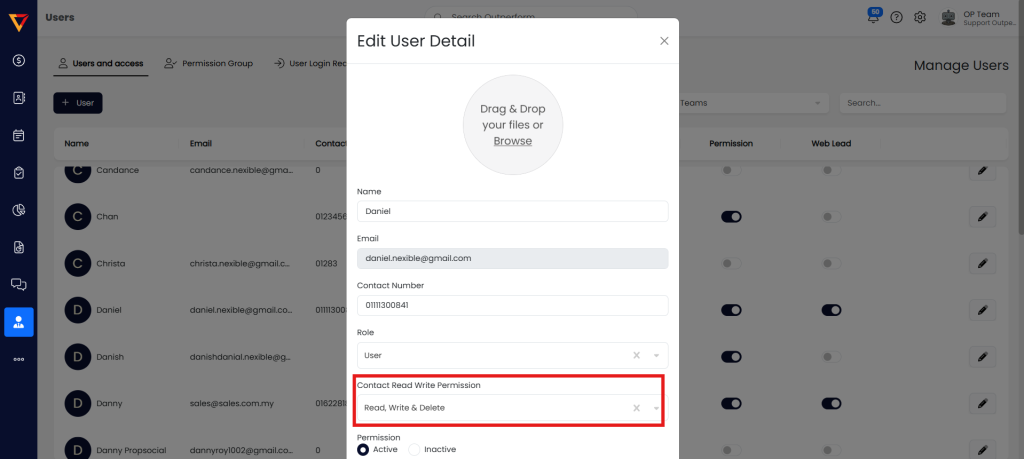
Step 7: Set Read & Write Permissions
Select one of the following options:
- Read, Write & Delete – User can view, edit, and delete notes & activities.
- Read & Write – User can view and edit, but not delete.
- Read – User can only view notes & activities.
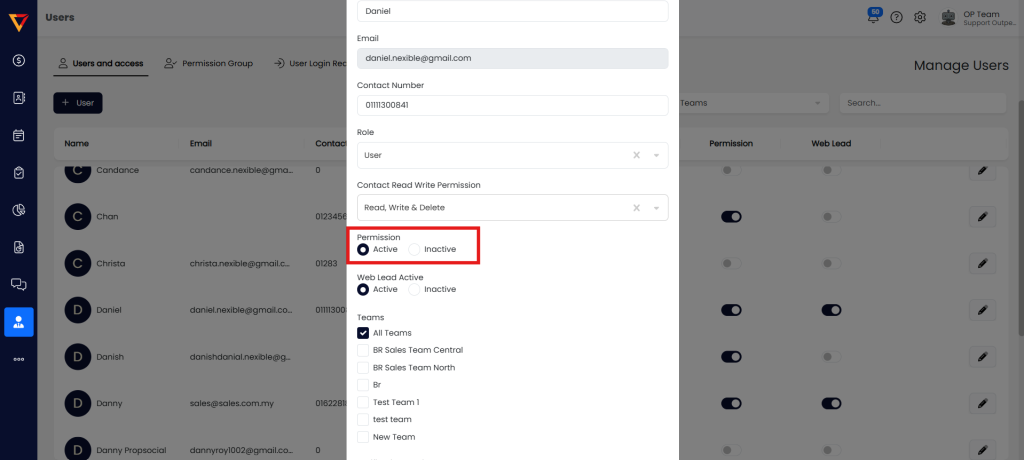
Step 8: Set Login Permission
- Active – User can log in to OP on both Web and App.
- Inactive – Login access will be disabled.

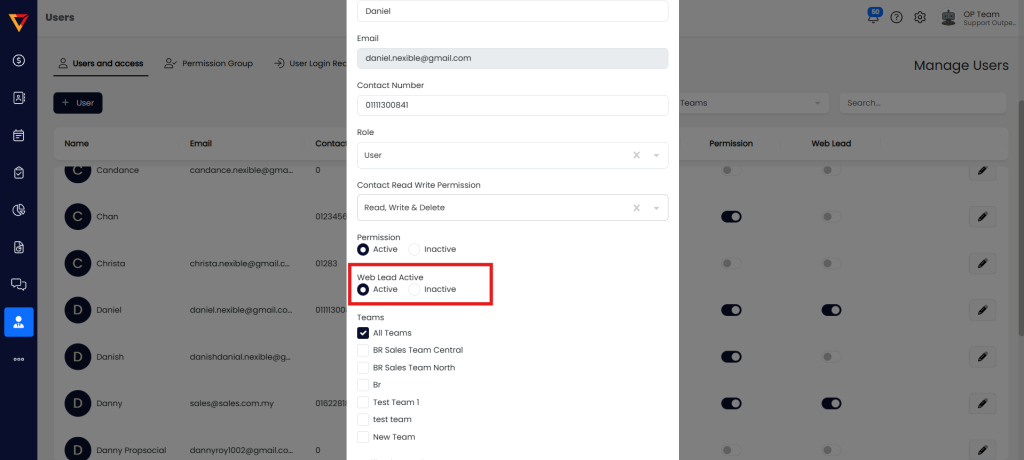
Step 9: Toggle Web Lead Reception
- Active – User will receive inbound leads from web forms or social media.
- Inactive – User will not receive inbound leads.
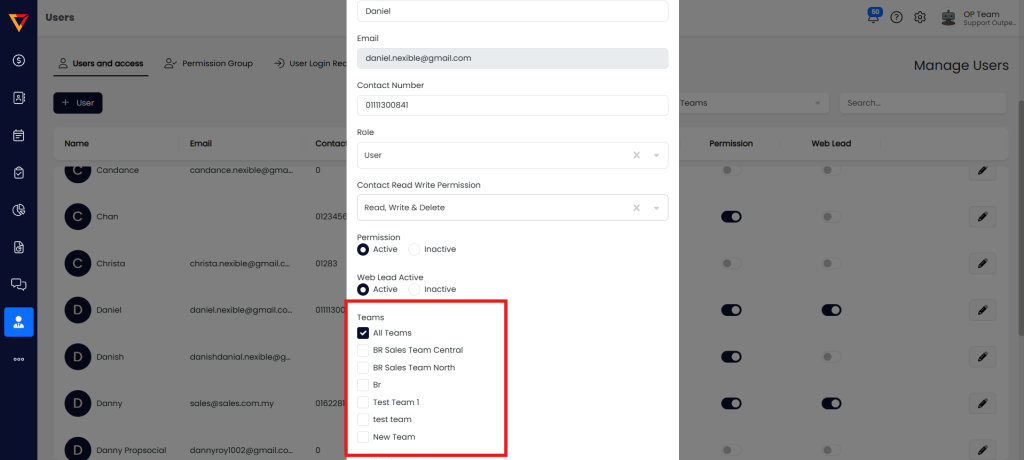
Step 10: Assign to Team(s) for Lead Routing
- Check the box for the team(s) you want to assign this user to.
- Click Update to save changes.
Pro Tips
- Always double-check email and permission settings before updating.
- Use Inactive status to temporarily restrict access without deleting the user.
- Assign users to relevant teams to ensure proper lead distribution and tracking.